Chocolate Olive Oil Snack Cake
Highlighted under: Sweet Sensations
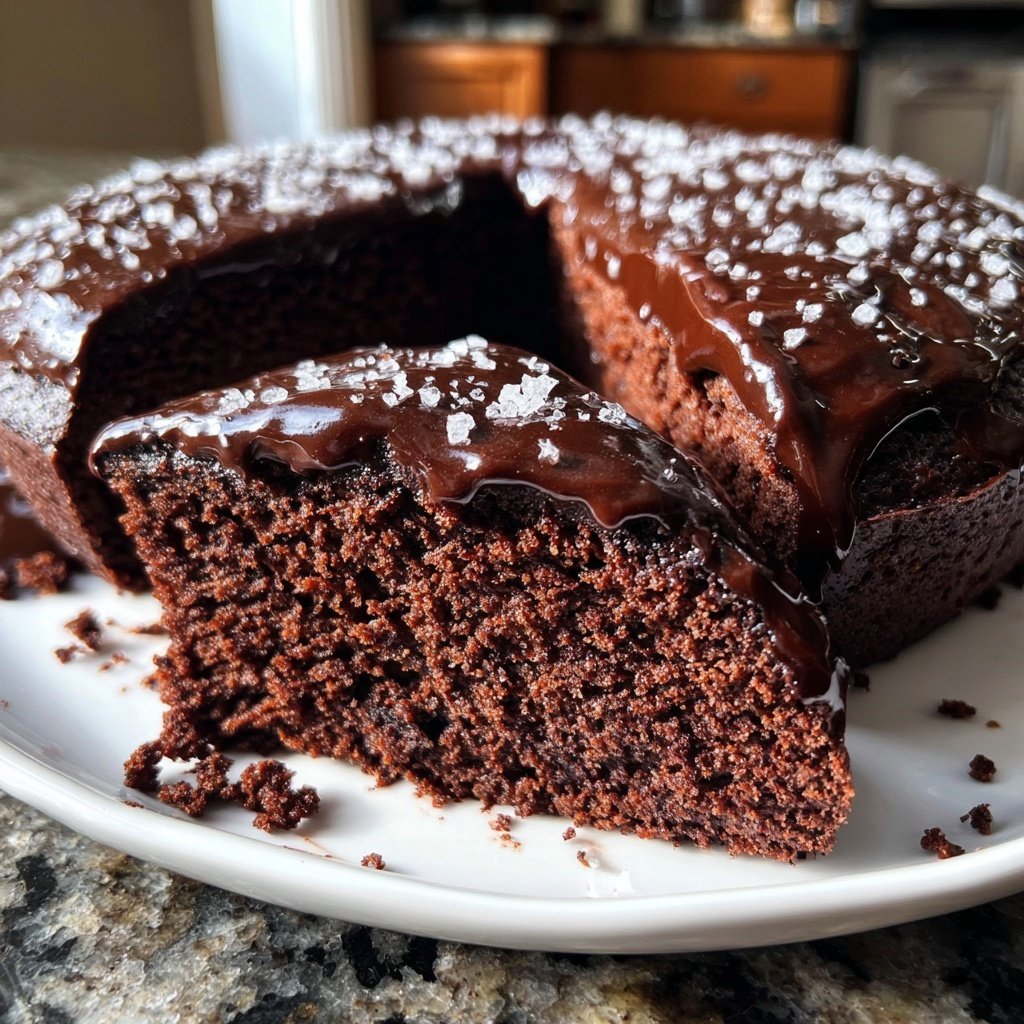
I can't wait to share my Chocolate Olive Oil Snack Cake with you! This recipe came about one afternoon when I wanted a simple yet indulgent treat. The unique combination of rich chocolate and fruity olive oil creates a moist and flavorful cake that's perfect for snacking. It's so easy to whip up, and I love how it stays fresh for days. This cake has quickly become a favorite in my household, and I think it will be in yours too!
When I first attempted this cake, I was skeptical about using olive oil in a dessert, but it turned out to be a game changer. The oil not only complements the chocolate but also keeps the cake incredibly moist. I found that using a high-quality extra virgin olive oil made all the difference in flavor, enhancing the overall richness without being overpowering.
One tip I learned is to mix the dry ingredients separately before adding them to the wet mixture. This helps ensure that the cocoa powder and baking soda are evenly distributed, preventing any lumps in the batter. Trust me, taking this extra step results in a smoother batter and a beautifully risen cake!
Why You'll Love This Recipe
- Gluten-free option available with almond flour
- Moist and decadent texture with a subtle olive oil flavor
- Perfect for any time of day – breakfast, snack, or dessert
The Role of Olive Oil
Using high-quality olive oil in this Chocolate Olive Oil Snack Cake not only enhances its flavor but also contributes to its moist texture. The fruity notes of olive oil complement the rich chocolate beautifully, creating a depth of flavor that is both unique and indulgent. I recommend selecting a robust extra virgin olive oil for the best results, as it adds a distinct richness that elevates this simple cake into something special.
Incorporating olive oil instead of butter has its benefits too. This cake remains remarkably moist over several days, thanks to the oil's ability to retain moisture. If you're aiming for a lighter option without sacrificing flavor, consider substituting half of the all-purpose flour with almond flour; this will also yield a gluten-free version that is deliciously nutty.
Tips for Perfect Baking
When mixing your batter, make sure not to overmix. Mix until just combined to avoid a dense cake. The incorporation of hot water into the mixture helps to activate the cocoa powder fully and keeps the batter loose, leading to a lighter texture. Additionally, you can opt for a whisk instead of an electric mixer for better control, ensuring you don’t aerate the mixture too much during the blending.
Keep an eye on your cake during the last few minutes of baking. The ideal doneness is indicated by a toothpick inserted into the center coming out clean or with a few moist crumbs. If you notice the edges starting to darken too much, you can quickly cover them with a piece of aluminum foil while baking to prevent burning.
Ingredients
For the Cake
- 1 cup all-purpose flour
- 1/3 cup unsweetened cocoa powder
- 1 tsp baking soda
- 1/2 tsp salt
- 1/2 cup granulated sugar
- 1/4 cup brown sugar
- 1/2 cup high-quality olive oil
- 2 large eggs
- 1 tsp vanilla extract
- 1 cup hot water

Instructions
Preheat and Prepare
Preheat your oven to 350°F (175°C). Grease and flour an 8-inch round or square cake pan.
Mix Dry Ingredients
In a mixing bowl, combine the flour, cocoa powder, baking soda, and salt. Whisk together until well mixed.
Combine Wet Ingredients
In a separate bowl, whisk together the granulated sugar, brown sugar, olive oil, eggs, and vanilla. Mix until smooth.
Blend Together
Gradually add the dry mixture to the wet mixture, alternating with hot water. Mix until just combined.
Bake
Pour the batter into the prepared pan and bake for 30 minutes or until a toothpick inserted in the center comes out clean.
Cool and Serve
Allow the cake to cool in the pan for 10 minutes, then transfer to a wire rack to cool completely before slicing.
Pro Tips
- For an extra touch, serve slices with a scoop of vanilla ice cream or a dollop of whipped cream on top.
Serving Suggestions
This versatile cake can be enjoyed anytime, from breakfast to dessert. For a delightful brunch treat, serve it warm with a dollop of Greek yogurt or whipped cream. Sprinkle some fresh berries on top for added texture and flavor. If you're serving it as a dessert, consider pairing it with a scoop of vanilla ice cream and a drizzle of chocolate sauce for an indulgent finish.
Another fantastic way to serve this cake is by dusting it with powdered sugar or serving slices with a rich chocolate ganache. These simple additions can elevate the presentation, making it suitable for gatherings or special occasions. You can also personalize each slice with unique toppings—try caramel sauce, chopped nuts, or coarse sea salt for an added crunch.
Storage and Make-Ahead
This Chocolate Olive Oil Snack Cake stores incredibly well. Once completely cooled, wrap it tightly in plastic wrap or store it in an airtight container at room temperature. It can keep fresh for up to five days. If you’d like to enjoy it over an extended period, consider freezing individual slices. Just wrap them in foil, label with the date, and freeze for up to three months.
To serve previously frozen cake, simply remove a slice from the freezer and let it thaw at room temperature for a couple of hours. For a warm treat, you can microwave a slice for about 15-20 seconds. This quick reheating can bring back that delightful moisture and enhance the chocolate flavor, making it feel as fresh as when it was first baked.
Questions About Recipes
→ Can I make this cake ahead of time?
Absolutely! This cake stays fresh for up to 4 days when stored in an airtight container.
→ Is there a gluten-free option?
Yes! You can substitute the all-purpose flour with almond flour for a gluten-free version.
→ Can I use a different type of oil?
While olive oil is recommended for its flavor, you could use vegetable or canola oil as a substitute.
→ What can I do with leftovers?
Leftover cake can be crumbled into a parfait with yogurt and berries or enjoyed with a cup of coffee.
Chocolate Olive Oil Snack Cake
Created by: Ivy Richardson
Recipe Type: Sweet Sensations
Skill Level: Beginner
Final Quantity: 8 servings
What You'll Need
For the Cake
- 1 cup all-purpose flour
- 1/3 cup unsweetened cocoa powder
- 1 tsp baking soda
- 1/2 tsp salt
- 1/2 cup granulated sugar
- 1/4 cup brown sugar
- 1/2 cup high-quality olive oil
- 2 large eggs
- 1 tsp vanilla extract
- 1 cup hot water
How-To Steps
Preheat your oven to 350°F (175°C). Grease and flour an 8-inch round or square cake pan.
In a mixing bowl, combine the flour, cocoa powder, baking soda, and salt. Whisk together until well mixed.
In a separate bowl, whisk together the granulated sugar, brown sugar, olive oil, eggs, and vanilla. Mix until smooth.
Gradually add the dry mixture to the wet mixture, alternating with hot water. Mix until just combined.
Pour the batter into the prepared pan and bake for 30 minutes or until a toothpick inserted in the center comes out clean.
Allow the cake to cool in the pan for 10 minutes, then transfer to a wire rack to cool completely before slicing.
Extra Tips
- For an extra touch, serve slices with a scoop of vanilla ice cream or a dollop of whipped cream on top.
Nutritional Breakdown (Per Serving)
- Calories: 380 kcal
- Total Fat: 26g
- Saturated Fat: 15g
- Cholesterol: 195mg
- Sodium: 85mg
- Total Carbohydrates: 32g
- Dietary Fiber: 3g
- Sugars: 24g
- Protein: 6g